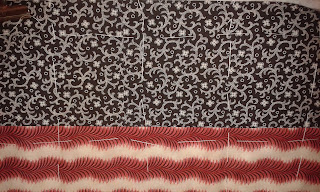
I decided to get the Birdy quilt basted while I had some time on my hands, and before it got too hot. I have an old wooden table in my family room that I use for basting. It is not big enough to take the whole quilt in one go, but I do it in segments. For me, it is far easier than doing it on the floor, and quicker than sending it to the machine quilter.
I lay out the 3 layers, and use large clips to attach to the edges of the table, with the centre on the table and the rest of the quilt falling over the edges.
Sometimes I pin baste if i am machine quilting, and sometimes I thread baste, especially if I am hand quilting. I had to thread baste this one as all my pins are already used in another quilt.
For the tacking I use a large doll making needle and yarn used for crochet. It is strong and flexible, and cheap! I can usually pick it up at the charity shops or garage sales.
I cut off lengths of thread that reach from one side of the quilt to the other. I start tacking in the centre and go as far as I can, then take the needle off the thread and just let it hang loose over the edge of the table. That will be finished off later.
The stitches are really big, and about a hand's width apart.....for me, that is about 4 inches.
I tack all the threads in one direction, then cross over the other direction, doing the centre again and letting the threads hand down the edges.
Once all the centre of the quilt is completed, you can then unclip, and move the quilt to one side. Reclip, after making sure it is all smooth, and start using those loose threads to finish off.
Just keep tacking with the threads that are falling over the sides, unclipping, moving, and reclipping until it is all completed.
I think it took me about 4 hours in total to do it. I worked for 2 hours to start with, then left it on the table for the rest of the day, and did a few stitches for 5 or 10 minutes, as I walked by the table. Finally finished it off in the morning, with about an hours work
On the back it looks like this. It can stay like that until I get around to doing the quilting. Really, I don't think it will be too long, as I really want to get this one finished now that I have rediscovered it.
What do you think of the backing fabric?? Pretty bright, eh?


i like your method of basting. i too use a table but use a tailors basting stitch and only go in one direction....love that backing
ReplyDeleteHello Wendy, I hopped over from Beckys as I was interested to see how you basted on a table. I love to hand sew, EPP and applique, so I shall enjoy looking round your blog. Best wishes Kath
ReplyDeleteLove the backing you are using. Picking backings is always a little difficult for me.
ReplyDeleteThanks for the tutorial Wendy - sounds well worth a try! I still scrabble around on the floor to baste but this sounds very manageable and I will file that idea away :)
ReplyDeleteLove the backing!